Smart Heating Solutions
Choosing the best Wedge Anchor for 2026 starts with the material it must secure. A fastener suited to a sound, dry concrete slab may not be right for cracked concrete, overhead work, or a damp exterior location. The details matter. Diameter, embedment depth, base-material strength, edge distance, and installation torque can all affect performance. So can corrosion exposure and the load direction.
This guide explains how to compare wedge anchors by application rather than by size or price alone. It considers material and coating options, published load data, installation requirements, and compatibility with the concrete. Manufacturer specifications are essential; a product label or online listing cannot replace them. Fit comes first. Where loads are critical, or conditions are uncertain, a qualified engineer should confirm the design and selection.
There is no single anchor that is best for every project. That answer is less tidy than a ranked list, but more useful on site. A small difference in concrete condition or installation depth can change the decision. This article highlights what to check before buying, how to read product information, and when to pause and seek technical guidance. Its recommendations should be checked against current manufacturer documentation for the exact anchor and application.
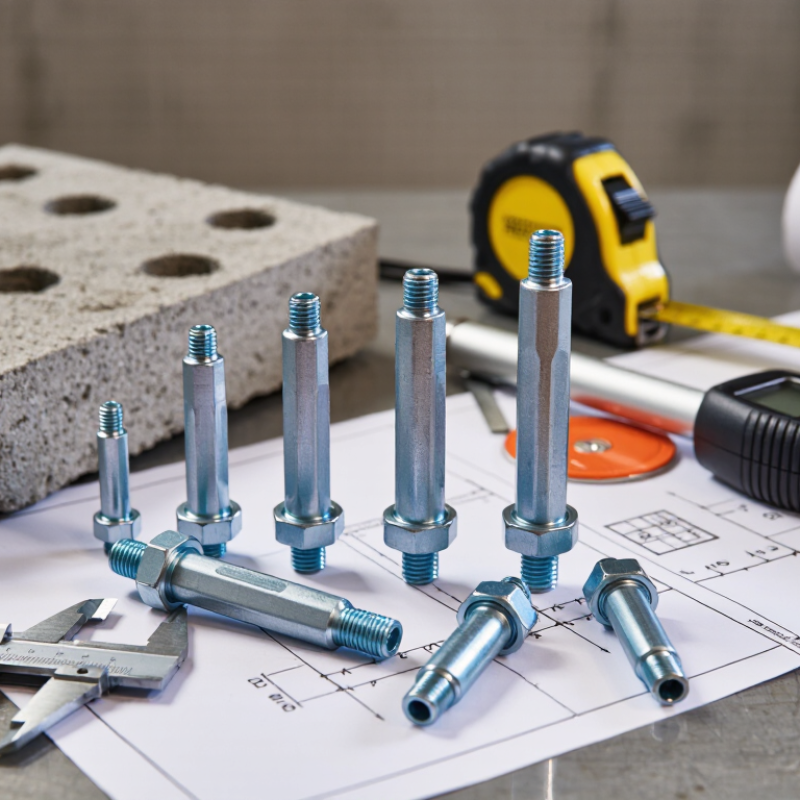
A wedge anchor is a metal fastener designed to secure fixtures in solid concrete. It typically has a threaded stud, a washer, a nut, and an expansion clip near its lower end. The installer drills a hole, clears out the dust, and taps the anchor into place. As the nut tightens, the clip is pulled against the tapered stud and presses outward on the concrete. That grip helps resist both pulling forces and sideways movement.
Simple in principle. Sensitive in practice.
For a dependable installation, match the anchor diameter and embedment depth to the fixture and the anchor’s specifications. The hole must be drilled to the correct diameter and depth; leftover dust can interfere with seating. Tighten the nut to the specified torque, rather than guessing by feel. Concrete strength, edge distance, spacing, and cracks also affect performance. A strong anchor in weak or damaged concrete is not a strong connection. Wedge anchors generally suit solid concrete, not hollow block or thin slabs. Even experienced installers check the details twice. It can feel fussy, but that small pause is worth it.
The best choice depends on the concrete, the load, and the installation—not just the anchor’s diameter. Check whether the concrete is cracked or uncracked, its compressive strength, and the required embedment depth. ACI 318-19, Chapter 17, models basic tension breakout strength using the square root of concrete strength and embedment depth to the 1.5 power. Edge distance and anchor spacing can reduce capacity. That matters.
Load direction changes the decision. A bracket pulling outward needs dependable tension capacity; a base plate exposed to lateral force needs shear capacity too. ASTM E488/E488M describes tests for anchor strength in tension and shear. Review the product’s applicable evaluation report for permitted loads and installation limits, then match those conditions to the actual job. Corrosion exposure, fixture thickness, and installation torque also matter. A stronger anchor on paper may still be a poor fit near a slab edge. Field conditions are rarely perfect, and assumptions deserve a second look.
Tips: Measure edge distances, verify concrete thickness, and use a calibrated torque wrench. Keep the drilled hole clean. Don’t substitute a guessed embedment for the specified value.
A wedge anchor’s material matters as much as its diameter. Zinc-plated carbon steel is often suitable for dry indoor concrete, while hot-dip galvanized steel offers more protection in damp settings. Stainless steel can better resist corrosion outdoors or near moisture, but it usually costs more. No material is immune to every environment. Salt, chemicals, and standing water can change the choice.
Size affects both fit and holding capacity. A larger diameter may support higher loads, but only when the concrete, embedment depth, and installation meet the anchor’s specifications. Anchor length must account for the fixture thickness and required embedment. For example, a thick steel base plate leaves less anchor length inside the concrete. Check the load tables for the exact anchor and concrete conditions; “bigger” is not automatically safer. I would not choose from diameter alone.
Tips: Confirm the concrete is sound and the hole matches the specified diameter. Keep anchors clear of edges and other holes by the distances listed in the installation instructions. Clean drilled dust from the hole, then tighten with a calibrated torque wrench when specified. Small installation details are easy to rush—and worth checking twice.
Match the anchor to the concrete before considering the fixture. Wedge anchors are designed for solid concrete, but strength depends on the slab’s condition, thickness, and reinforcement. Check whether the concrete is cracked or uncracked, and use published performance data that matches those conditions. Concrete varies. Spalled edges, weak patches, and hidden voids can change how reliably an anchor holds. If the slab condition is uncertain, pause and verify it rather than relying on appearance alone.
Next, compare the project load with the anchor’s rated capacity, including any tension, shear, or vibration. Choose a diameter and embedment depth from the relevant load data, then allow for the fixture’s thickness and washer. A longer anchor is not automatically safer. Keep the specified distance from slab edges and between anchors; placing one near a corner can reduce capacity. Small details matter. Drill the specified hole diameter and depth, remove dust as directed, and tighten to the stated torque. For overhead, dynamic, or safety-critical installations, have a qualified professional check the design and installation conditions. Even a careful selection can be wrong when key site details are missing.
| Project or Concrete Condition | Wedge Anchor Match | What to Check Before Selection | Important Limitation |
|---|---|---|---|
| Indoor attachment to sound, solid concrete | A zinc-plated carbon-steel wedge anchor may be suitable for a dry, non-corrosive indoor environment. | Match the anchor diameter and length to the fixture, required embedment, concrete thickness, and installation instructions. | Zinc plating is not a universal choice for damp, exterior, or chemically aggressive environments. |
| Exterior or frequently damp location | Consider a corrosion-resistant material or coating suitable for the actual exposure, such as an appropriate stainless-steel or hot-dip-galvanized option. | Consider rain, standing water, salt exposure, de-icing chemicals, and contact with dissimilar metals. | Corrosion resistance varies by material, coating, and environment. Confirm suitability for the site conditions. |
| Cracked concrete or a project with seismic requirements | Use only an anchor specifically qualified and listed for the applicable cracked-concrete and seismic conditions. | Check the product’s evaluation documentation, design loads, concrete strength assumptions, embedment, and applicable building-code requirements. | A standard wedge anchor should not be assumed to be approved for cracked concrete or seismic use. |
| Installation near a slab edge, corner, or another anchor | Select an anchor and layout that satisfy the required edge distances and spacing for the design. | Review the anchor’s published design data and account for concrete thickness, anchor spacing, and fixture geometry. | Insufficient edge distance or spacing can reduce capacity and may cause concrete breakout or splitting. |
| Heavy or safety-critical attachment | Choose only after calculating tension, shear, and combined loading using applicable published design data. | Include fixture loads, load direction, concrete condition, embedment, installation method, and required safety factors. | There is no single capacity that applies to every wedge anchor; capacity depends on the anchor, concrete, installation, and design conditions. |
| Thin slab or limited embedment depth | Check whether a listed anchor length and embedment can fit without violating slab-thickness requirements. | Verify the required hole depth, minimum concrete thickness, fixture thickness, and clearance from the back of the slab. | Do not shorten embedment or drill through the slab unless the design and anchor instructions permit it. |
| Overhead or vibration-prone installation | Use a configuration permitted for the load direction and service conditions, with installation performed to its specified procedure. | Confirm allowable tension loads, required tightening torque, inspection needs, and any project-specific vibration provisions. | Do not assume that tightening beyond the specified torque improves performance; follow the product instructions. |
| Hollow block, brick, or other masonry unit | A conventional wedge anchor is generally intended for solid concrete, not hollow base material; select an anchoring system qualified for the masonry instead. | Identify the actual base material and whether it is solid, hollow, grouted, or multi-wythe masonry. | Do not use a concrete wedge-anchor recommendation as a substitute for masonry-specific approval. |
Selection rule: The best wedge anchor is the one whose material, diameter, embedment, and documented load performance match the concrete and exposure conditions. Drill the specified hole diameter and depth, clean the hole as instructed, and install and tighten the anchor according to its published instructions. For structural or safety-critical work, have the anchor design checked against applicable codes and project requirements.
What Is the Best Wedge Anchor for 2026?
What Are the Steps for Correct Wedge Anchor Installation?
A reliable installation starts with the right anchor for the load, concrete strength, and fixture thickness. Check the anchor instructions for its required diameter, embedment depth, spacing, and edge distance. Inspect the concrete for cracks or crumbling. Mark each hole carefully, and keep clear of hidden pipes or wiring. Small measuring errors matter.
Drill perpendicular to the surface with a hammer drill and the specified carbide bit. Make the hole deep enough for the anchor and any drilling dust. Clean it with a suitable brush and vacuum; dust left inside can interfere with setting. Place the fixture over the hole, insert the anchor, and tap it gently until the washer and nut sit correctly. Tighten the nut to the manufacturer’s stated torque using a calibrated torque wrench. Don’t guess. I still recheck my measurements before drilling, because fixing a misplaced hole is not always simple. Inspect the finished anchor for movement, damaged threads, or concrete cracking.
Tips: Wear eye protection and hearing protection while drilling. Keep the bit straight, and avoid overtightening. If the concrete condition or load is uncertain, pause and consult a qualified installer or an engineer.
For standard wedge anchors, the nominal anchor diameter generally matches the required drill-bit diameter. Always confirm the bit size, embedment depth, and installation requirements in the specific anchor’s manufacturer instructions.
Installation steps: Select an anchor suited to the concrete and load; mark the hole location; drill perpendicular using the specified carbide bit; drill to the required depth; remove dust and debris; insert the anchor; then tighten to the specified torque. Wear appropriate eye and dust protection.